The Road to Now
Adolescence
Growing up, I've always had a love for tearing apart things, seeing how they work, then fixing them if I can or just putting them back together. I also really have had a consistent passion for cars; makes, models, options, always running through my head. From the moment I could legally drive, I virtually demanded from my parents that my first car be a manual (I wasn't spoiled, I promise). I would drive anywhere and everywhere I could. First in my 1988 Ford Bronco II that looked pretty much like this:
 |
| 1988 Ford Bronco II |
Then in my 1998 Honda Prelude that looked something like this (okay, maybe a little spoiled):
 |
| 1998 Honda Prelude |
College
As I went through high school, I excelled at math and science-y type things. As a result, I decided to pursue a Mechanical Engineering degree. During my college endeavors, I also became a member of my school's Formula SAE team. Basically, a bunch of engineering students design, build, and manufacture a race car from scratch. This allowed me to learn a lot about:
- Fabrication (turning blocks of metal into functional parts using a mill and a lathe)
- Manufacturability (that's cool, but how easy is it to make?)
- Servicability (once you get it on, is it going to be easy to access/take off?)
- Assembly (now that they're built, can you actually put these things together?)
The Rebel
While still in college, similarly to my demand for a stick shift, I started looking into another automotive "challenge," motorcycles. What do I need to do to get an endorsement and a bike? I knew as a college kid, purchasing a bike was virtually not an option. My step-dad had a bike in the garage that I knew was sitting there so I had to begin the hinting. In the meanwhile, I took the MSF course and got my endorsement. Time went on and after a short while, he gave me the bike (definitely spoiled)!
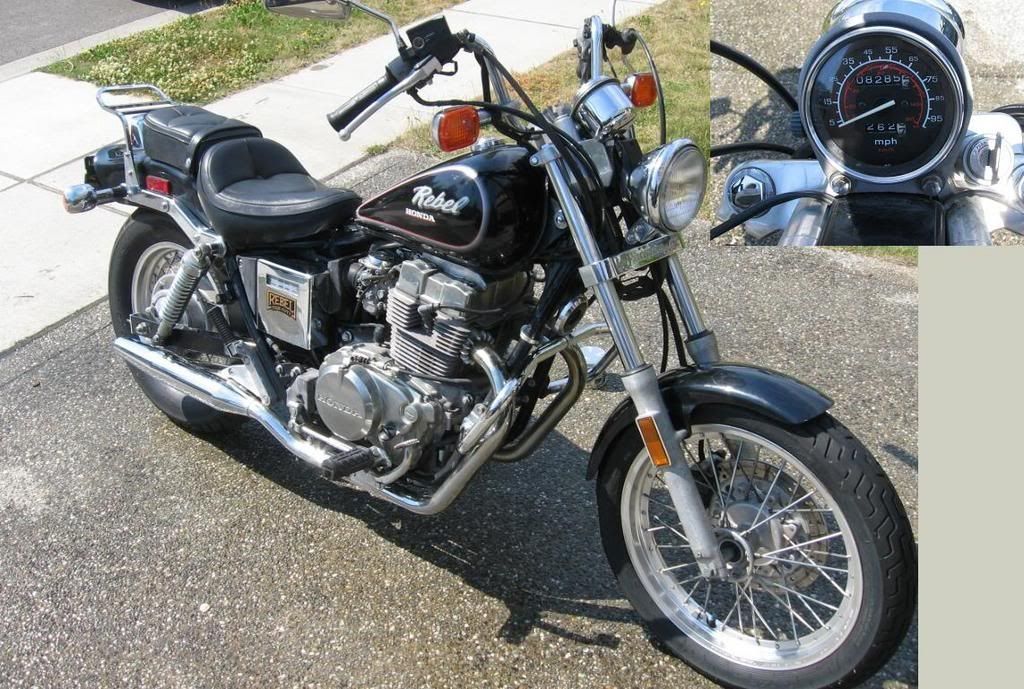
Motorcycle and endorsement in hand, I was ready to roll. Only one problem... the bike didn't run. You see, the motorcycle, the 1986 Honda CMX450 or Rebel:
 |
| 1986 Honda Rebel 450 (CMX450) |
had been sitting in the garage for about 10 years with fuel left in the system; thus, my first project.
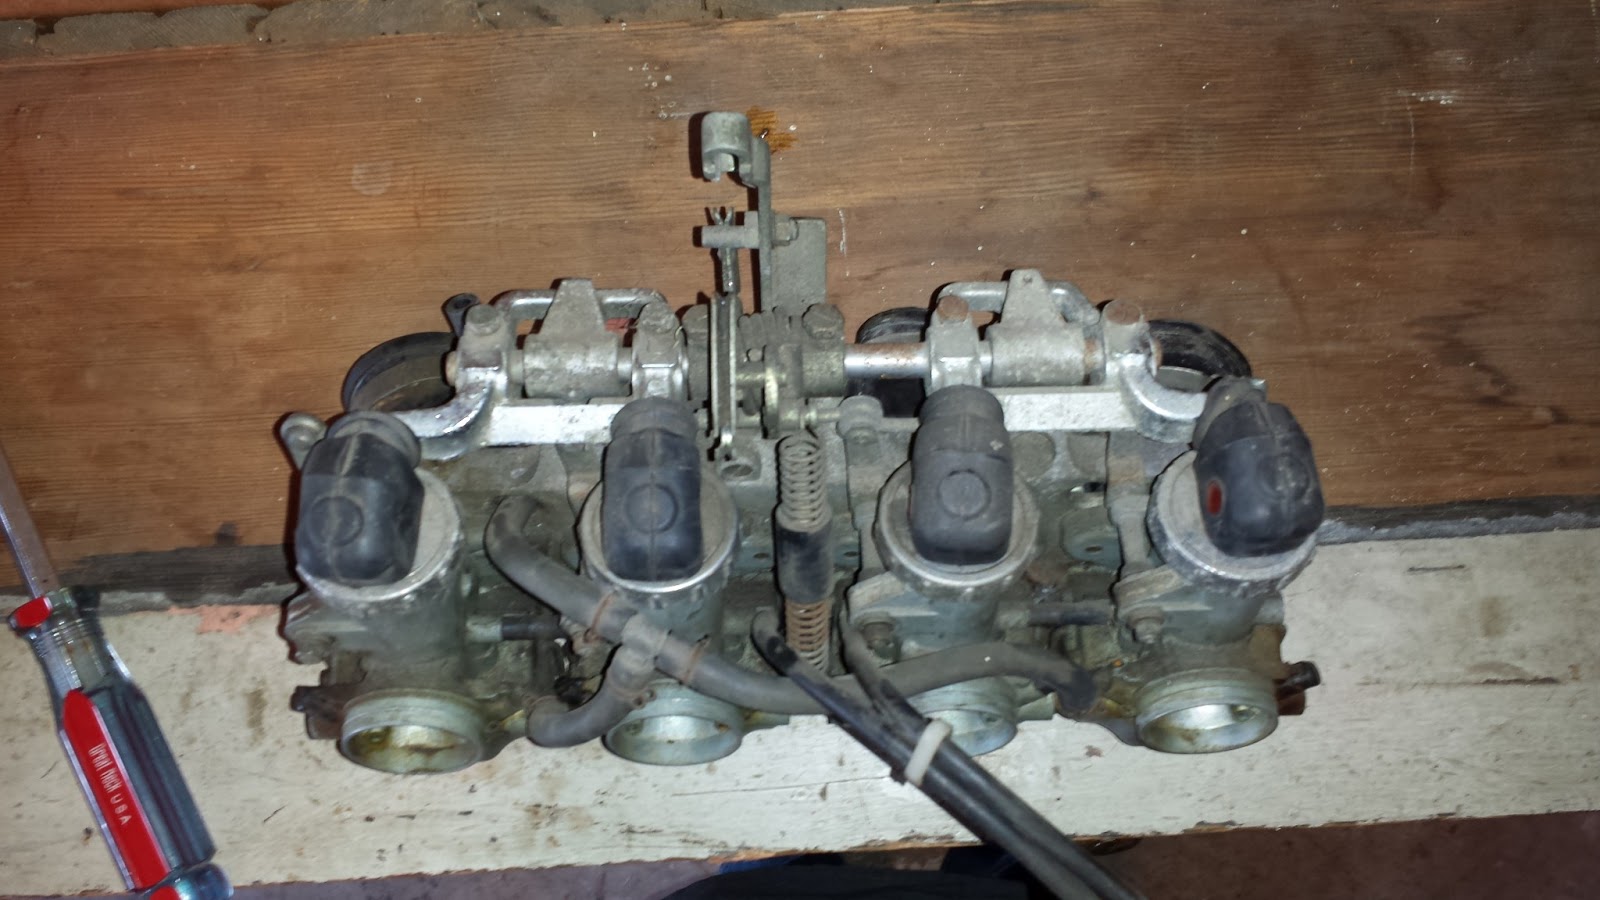
Although in beautiful condition, I had to get it running. The tank was completely rusted and wreaked of varnished fuel. The fuel lines and carburetors were all gummed up. I began the process of tearing down the components to determine the work ahead.
The tank took the most effort. I found a 3 step process that essentially involves throwing nuts and bolts in the tank with a solvent and rolling the around to break up the rust, then coating the tank with a sealant. After tackling the tank, I opened up the carbs with virtually no idea of what I was doing. I cleaned everything I could and tried to ensure that I didn't damage anything.
After all that, I put it all back together and tried to fire it up. After a few attempts at turning it over, it fired up! I was successful!!!! A quick tune up from a professional and I was on my way.
The Bug
After getting the Rebel running, I was ready to roll. I hit the road any chance I could, weather permitting. Even though I was 6'4" on a tiny 450 cruiser with my knees in my face, I didn't care. There's nothing that could compare to the (cliche) freedom I got to feel on my bike. Have to go to the bank? Bike. Need a haircut? Bike. Going the same place as everyone else? I'll meet you there on my bike. It was exhilarating and liberating and still a challenge. I was hooked.
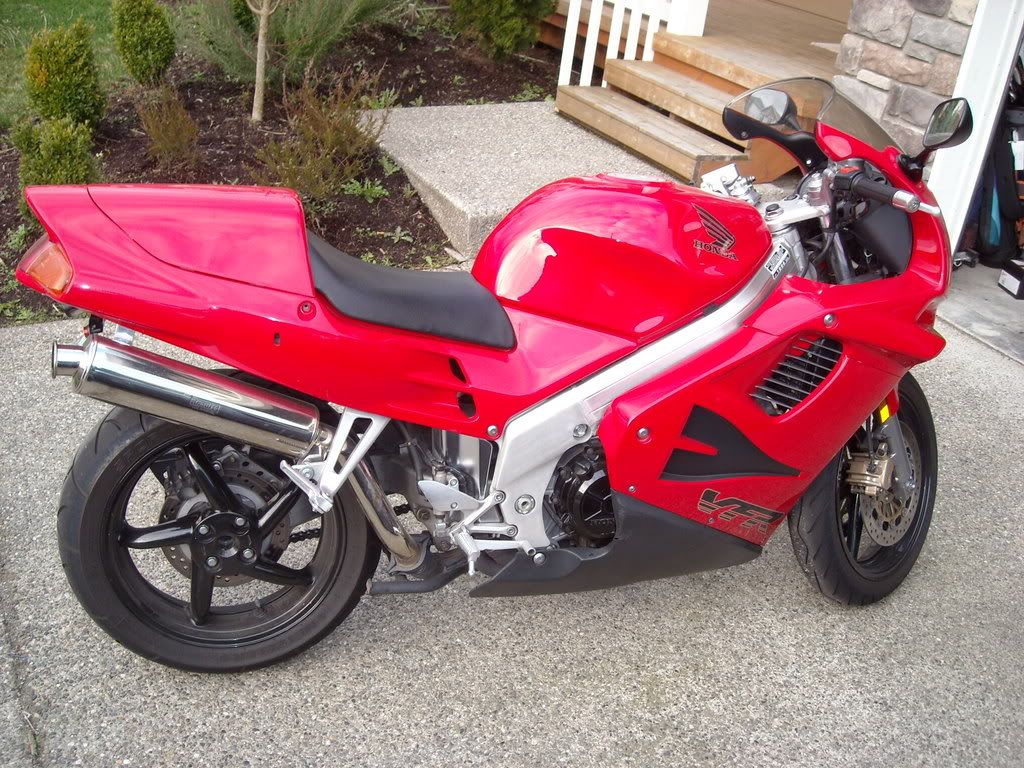
After college, I sold the Rebel and got a VFR750:
 |
| 1996 Honda VFR750 |
Motorcycling was a new passion in my life that I would never let go.
Real Life
After having the VFR for a little while, my fiance moved up to live with me, then we got an apartment and had to plan our wedding. Because we needed a bit of liquid cash and we were moving into an apartment with no garage, I decided to sell the VFR (this was my adult decision).
4 years went by. We had a few different apartments, we got married, we bought possessions, got reliable vehicles, had a magnificent honeymoon (this part is key), had a couple of dogs, saved money and bought a house. Realistically, everything was going really well and we were on a great track in life. There was only one thing missing, those 2 wheels.
Rejuvenation
So one day, my wife and I were talking about our honeymoon (remember how I said it was key?) and she kept talking about what an amazing time she had. We had gone to southern Florida, hung out in Miami, had fancy meals, rode scooters on South Beach, partied, then went on a cruise in the Caribbean. One thing that she kept saying that stuck out for her was the scooter ride. We had rented scooters for a couple of hours to just cruise and she said she had the time of her life. She loved the openness, the thrill, the euphoria. This led us to a discussion about motorcycles.
In a conversation about motorcycles, she said how much she'd love to have that as a hobby but riding dirt bikes. I was all for it because 2 wheels was something I had lost 4 years ago. After talking for a bit, and being that we live in a major metropolitan area, I convinced her that we should go the route of dual-sports instead. By this solution, we would have the means to get to our destination with a bit of road riding, then ride a bit off road. Additionally, I would want to commute to work and I couldn't do that on a dirt bike alone. After the discussion, we decided to go for it.
We did our research and found what we were looking for. A Honda 1998 XR650L for her (that we would need to modify for her height)
 |
| 1998 Honda XR650L |
And a 2005 Kawasaki KLR 650 for me (not mine pictured, but almost identical).
 |
| 2005 Kawasaki KLR650 |
We got her going and I was finally back on 2 wheels. I couldn't be happier. Not only do I have a wife that is okay with me riding motorcycles but she wants to do it as well!
As time went on we realized that the dual-sports were not fitting. Too far of a drive to see anything off road, the KLR was barely stable on a 70 mph commute, the bikes were too big for any true off road activities, and the lowered XR was still too tall for the Mrs. So some discussions were had and I started looking for alternatives.
With some searching and lots of test rides I found something that I really, really wanted.
The Adventure
Having run the trial and error of dual-sports, we came to a mutual conclusion that it just wasn't going to work. As a result, I started looking for a bike that was really something I wanted. I had held an endorsement now for 8 or so years. I had fixed a bike up, rode a small, older cruiser, a sporty touring bike, and a dual-sport. I had definitely gone through a progression, it was time for a real bike.
I started looking at liter bikes. I thought I would never step up to that level but then putting it into perspective I didn't just jump into the deep end. I had really taken my time and gone about things right. I decided that I didn't want a supersport because I would still be commuting and I wanted something for all occasions. I started looking at standard/naked bikes.
After narrowing down the options I had a list. There was the FZ1, CB1000R, Speed Triple, SV1000, Z1000, and a couple more like the Tuono. I didn't like the look or the seating of the FZ1. The CB1000R was too new so I couldn't get it for a reasonable price. I test rode the Z1000 and, although a fantastic bike, I couldn't get over the need to wind up the inline 4 to really feel the power. This solidified my lack of desire for the CB1000R as well. This left either a V-twin like the SV1000 or a triple. I test rode the Speed Triple and absolutely LOVED it. The torque was across the board. The maintenance cycles were few and far between. Everything you could ever read about the bike was just gushing all over it. The problem was that once people buy them they don't sell them.
Given the understanding that one of these was going to be hard to come by, I started looking. Although I live in a major city, there was still virtually nothing. After a period of time, I started to get mildly infatuated with the idea of this bike and started looking farther away.
One day, I found a Speed Triple in perfect condition, for a really, really low price.... the only catch? It was just under 1000 miles away. Luckily for me I had accrued frequent flier miles from my work; not enough to do a decent trip with, but about enough to take a one way flight to somewhere less that 1000 miles away. How convenient right? I tell my wife about this (keep in mind I have never done anything like this before) and for some reason she says go for it (Okay, confirmed: spoiled). So I call the guy, confirm that it is what he says it is and told him that I'm serious. I booked a flight and that weekend headed to my new bike.
When I arrived, the guy picked me up at the airport and took me to his place. The bike was exactly what he said it was and made the transaction. He let me gear up, fill up my camelbak and I was off. Now I had just under 800 miles of trek ahead of me; just me and my new bike with about 2/3 desert and 100-110 degree temperatures.
 |
| 2005 Triumph Speed Triple 1050 |
The journey was great and luckily no scares or mishaps. I got to know my bike and see a few minor sights on my voyage home. I absolutely fell in love with this Speed Triple and this is a bike I don't see myself every letting go.
Keeping the Passion Alive
Now, being a mechanical person and a motorcyclist, all I want is more. If you've ever gotten "the bug" for something, you know exactly what I'm talking about. There's always something more you can try, or see, or experience. It's not that what you have now isn't enough, it's the fact that this passion infects your brain. You think about it constantly. It keeps you awake at night imagining what you could be doing or experiencing that you haven't already. This being the case, I needed (by my definition) a project bike.
I needed something that could fulfill all of those little tastes of problem solving, creativity, and success that I had attained from projects of the past; all of this while tying in with the passion that I cannot get out of my system. I needed something that I could put my mind to and conquer, one little project and step at a time. I needed something that wasn't easy, wasn't "the norm," and that I could feel dignified about once I had met my accomplishment.
I began my pursuit of a project bike and, similarly to my "all-fulfilling" bike (the Speed Triple), started narrowing down components and weighing pros and cons. I wanted something old enough that it had that vintage, origin of motorcycles feel, kickstart and all. Something that wasn't too common, but common enough that I could get parts and information for. Something that wasn't in so good of condition that I didn't want to touch it, but complete enough that I had all the parts and could decide what I wanted to do with it as an end result. As an outcome I narrowed it down to 2 mid-'70s models: The Honda CB550 and CB750.
The Project
After having narrowed it down, I searched and searched to find something in my budget that met my criteria. There were options out there, but they either just weren't right, not complete enough, too perfect, or just plain too much.
Then, one day in my avid checking, I found the bike. It was a 1975 CB750F. That's the super sport model with the flat tank and the rear disk brake. It was complete but not running but most importantly, the motor was not frozen. I had to get it. I called the guy, and from that point it was a done deal. We met, got the bike in the back of my truck, exchanged money and title, and I took it home.
 |
| 1975 Honda CB750F Super Sport |
Finally, the bike is all mine and it's time to let the project begin!!!