The Tank
Upon getting this bike, I knew my first trouble area would be the fuel tank. For those of you that don't know why leaving gasoline in an engine/engine parts for a prolonged period of time (sometimes a matter of a month or two), I beg you not to try it. As gasoline sits, it basically breaks down into a varnish and does 2 things: rusts steel and creates a sticky, gummy solution everywhere. The result of this on motorcycles usually becomes a rusted tank and gummed carbs and fuel lines. This being the case, I knew I had a few things to take care of.To take care of the rusted tank, I really wanted to try and get all of the rust out that I could. This would ensure I had the best running conditions for the future. After pulling the tank off I removed the petcock and fuel filter and checked to see if it held water. I filled the tank and plugged the petcock hole and didn't see a leak anywhere so it looked like I had a usable tank.
The next step was to figure out how the hell to do this "electrolysis to remove rust." From everything I had watched/read/heard, it really works astonishingly well to get rid of rust. This was the way to go. First off, I watched this video which was amazingly helpful:
So from here I needed a few things: Some wire, big pieces of metal, a plastic tub, and "washing soda" (whatever the hell that is). The metal and wire were super cheap from home depot. I picked up 400ft of wire for rebar for under $4, 2-1ft pieces of rebar for just over $1 each, and a bigger metal "cleat" for $0.90. The plastic 27 gallon tub was just under $10. The only thing left was washing soda. That stuff is super cheap but hard to find. I ended up finding it at Fred Meyer for just under $4. So I got what I needed (I also picked up some wire brushes to clean things and some masking tape to label things).


The problem with electrolysis on a gas tank is that the best place to put the "rust collecting" metal pieces is in the tank... however, they can't be touching the tank. So what I did is I put duct tape over the ends of the piece that was going in the tank.

My thoughts were that this would block the connection between the tank and the steel rod to keep the electrolysis flowing.
Next, I had to setup the tank and the gas cap that were rusted. I brushed off a spot on the tank to ensure that the wire would have connectivity, then wrapped that wire around it.

I then connected the tank to the gas cap. The way the electrolysis setup goes is that the parts need to have the negative connected to them, and the "rust collecting parts" need to have the positive connected them.

Next I needed to setup the rust collectors to not be touching but be able to be connected. Kind of hard to see, but i had the tank and cap connected at the bottom (right side of the image) and the steel rebar and steel flange (inside the tank) connected at the left side (wire going across the tank).
 |
| Electrolysis Setup |
After wiring everything up, I needed to add the solution. Here, what they said I needed is water with ~1 tbsp of washing soda per gallon. To accomplish this I used a 5 gallon bucket then filled the black tub.
 |
| Soda Wash for Electrolysis |
Once filled it looked like this:
 |
| Electrolysis Setup |
I had a 1.5 amp 6/12V battery tender/charger. After running it for about 30 seconds, the charger read "trouble" meaning it had shorted or faulted. I messed with this for quite a while and eventually determined that the steel component in the tank was causing issues. That, and it being at 12V just didn't seem to work. I dropped it to 6V and set the steel shank out of the tank. As time goes on, if this doesn't yield the desired results, I will create something better for in the tank.
Moving On
Since the tank had to sit, I figured I'd move on to getting the other components on their way. I planned on getting the carbs out since I knew there was work to be done there. I had tried earlier just to move the throttle and no luck so I knew the carbs were stuck.
First step was to remove the airbox.
 |
| 1975 CB750F Carburetors and Air Box (Left Side) |
 |
| 1975 CB750F Air Box |


Upon removing the airbox (which was a bit of a pain in the ass), I was pleasantly surprised to see that the air filter looked almost new. 30K miles on a 38 year old bike... just not what I had expected. Good enough, I'll leave it aside for now.
Next stop the carbs.

To get the carbs off, there were the 4 boots that mounted it to the engine. After removing the throttle cables, I loosened the clamps holding the boots, but there was no victory there. Being almost 40 years old, the boots were as stiff as could be. It took quite a bit of delicate prying and wriggling to get the carbs off but I finally managed.
 |
| 1975 CB750F Carbs Intake Side (From Air Box) |
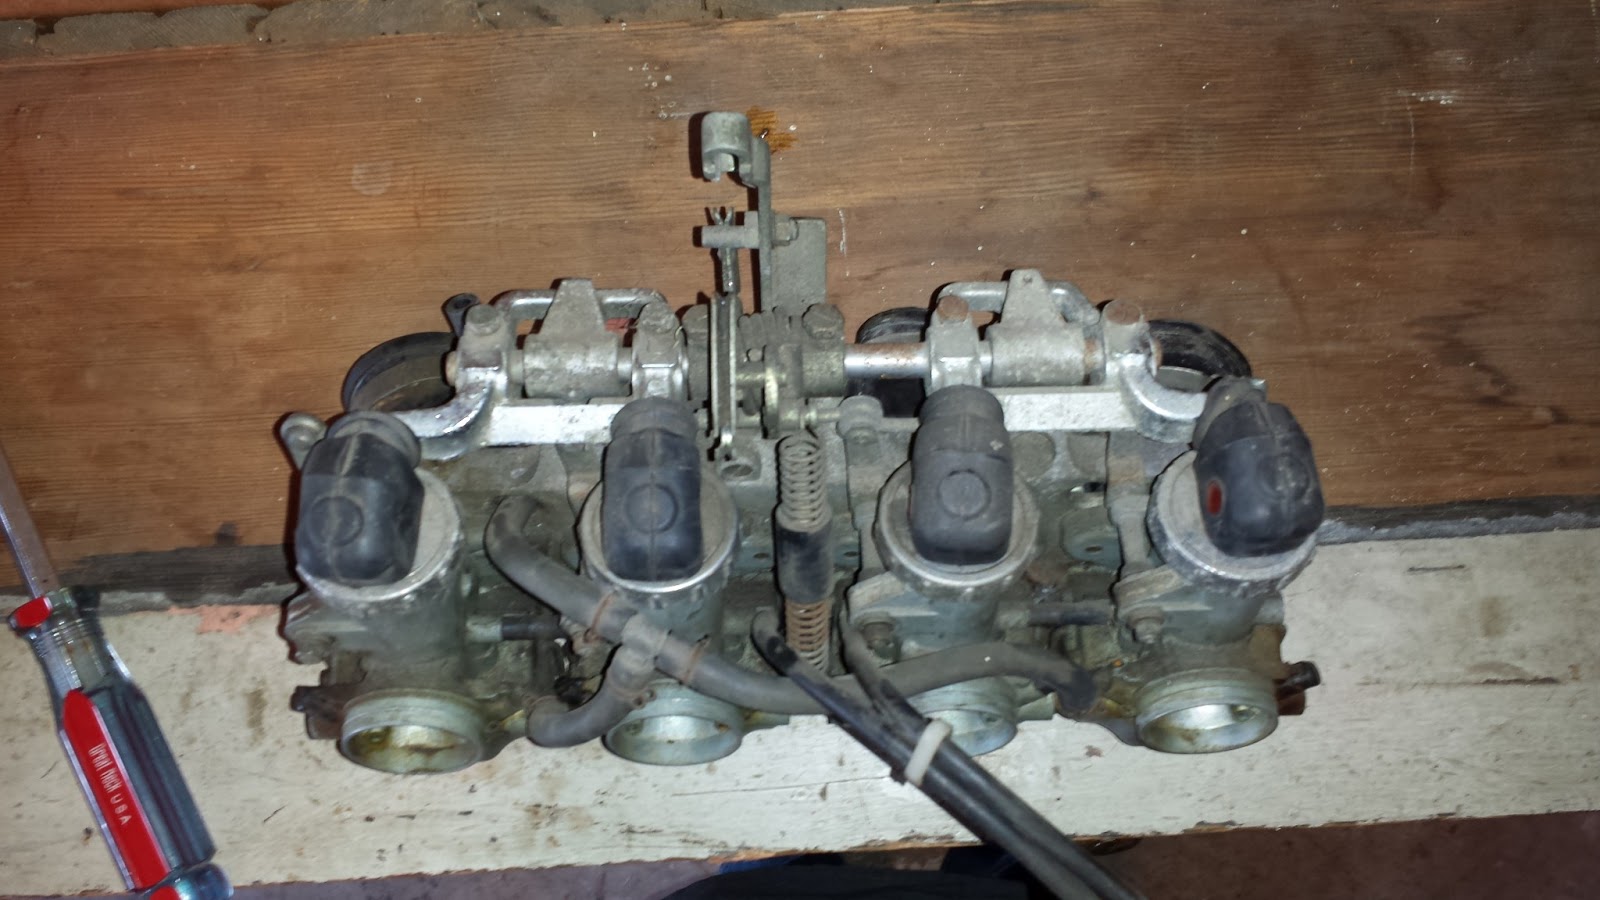 |
| 1975 CB750F Carbs Top |
 |
| 1975 CB750F Carbs Output Side (To Engine) |
 |
| 1975 CB750F Carbs Bottom |
 |
| 1975 CB750F Carbs Right Side |
Now the majority of the bike will be resting on its own for a while.
 |
| 1975 CB750F No Carbs, Air Box, or Fuel Tank |
In tackling the carbs, I got my workbench setup, got my tools in order and prepared to commence. One thing that may be helpful to those of you looking to "fiddle" with carbs is this video:
This video gives a simple yet clear and detailed explanation of the basics of dealing with a carb and how it works.
So I got my carb station all set up.

Carb cleaner on hand and ready to dismantle. Upon, taking #1 (then 2, 3, and 4) apart, I was not surprised to see what I found.

 |
| 1975 CB750F Carburetor with Varnished Gasoline |
The bowls and jets were all filled with gritty junk and the throttle slides and needles were gummed up with varnished gasoline. Oh well, I got them all torn down.
 |
| 1975 CB750F Carbs Disassembled |
Next step is to clean everything thoroughly and reassemble.
No comments:
Post a Comment